Working with the Parts List
The parts list gives you detailed information about each part in an illustration. To see a parts list:
- Enter a VIN or manually select a Lineup, Model Type, and Catalog.
- Select a Section.
- Click on a Figure caption or thumbnail, depending on your Navigation Style settings.
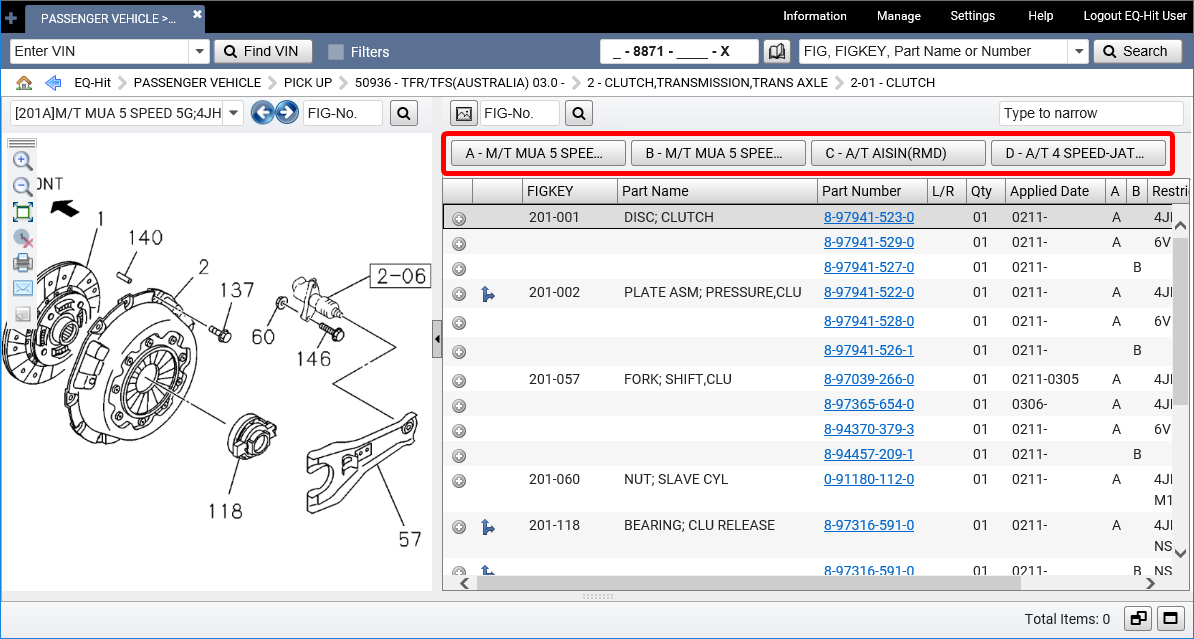
- The parts list will appear on the right half of the side-by-side display:

The specific information displayed in the parts list depends on the selected catalog.
Filtering the Parts List
When you enter a VIN, EQ-Hit automatically hides parts that do not match. If you have not entered a VIN, or have turned VIN filtering off, you can still filter parts by selecting one of the Applied Model Definition buttons above the parts list:
The parts list will then display only the parts that apply to that model, and will highlight the applied model.
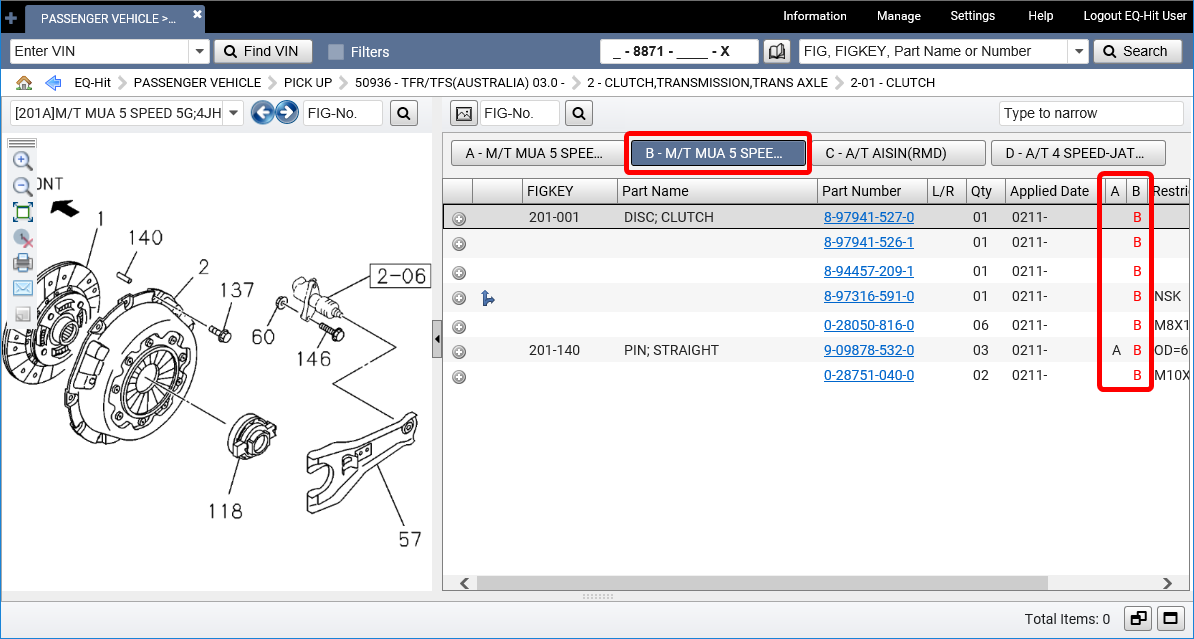
Tip: You can select more than one Applied Model Definition button.
Note: a few catalogs (Hino/Nissan joint ventures) work differently. In these vehicles, a single FIG may have dozens of separate illustrations, with all parts for that FIG shown on each illustration, rather than filtered by illustration, and with no Applied Model buttons. In these catalogs, use the Type to narrow field described below.
Find a Specific Part
Type text in the Type to narrow field above the parts list to filter the parts list so that only parts containing that text are displayed.
Understanding the Parts List
| Element | Function |
|---|---|
|
|
Click this icon to add the part to the current picklist. After the part is added to the picklist, the icon changes to a green check mark |
|
|
The part has a note. Click to see the note in the part details display. |
|
|
There are Best Value Parts available. Click to see these options in the part details display. |
|
|
There is supersession data for this part. Click to see the newest part in the part details display. |
|
|
There is a document or Technical Service Bulletin (TSB) attached to this part. Click to see available documents in the part details display. |
|
|
The part is a component of a larger assembly, or the part is an assembly of smaller components. Click to see the related assembly in the preview window. |
|
|
There is CKD or Limited Edition information about the part. Click to see this data in the part details display. |
| FIGKEY | The first data column, labeled FIGKEY, displays FIGKEYs that match the corresponding parts in the illustration. Click this number to highlight the related part(s) in the illustration. |
|
|
Click the blue underlined Part Number to open the part details display. |
|
|
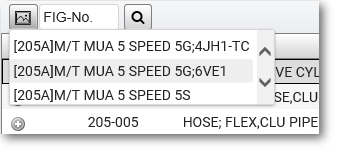
Appears when figures contain multiple illustrations. Click the Preview button to display a list of additional illustrations. Select one to compare these images side-by-side.
If you have selected a FIGKEY which appears in multiple illustrations, the preview list will indicate illustrations which contain that FIGKEY with an asterix.
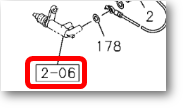
TIP: You can also preview linked illustrations in the same way by clicking their SEE FIG number callouts on the illustration itself:
|
|
|
These columns indicate whether the part applies to each model. |
| Right-click Options |
Right-click your mouse anywhere in a part entry for more options:
|


Resize the Panes
You can resize the parts list by clicking on the border between the panes and dragging your mouse left or right.

When the panes are the width you want, release the mouse button. To return the parts list to its normal size, click the icon located on the border between the illustration and parts list panes.